February DIY - Finished
Saturday, February 22, 2020
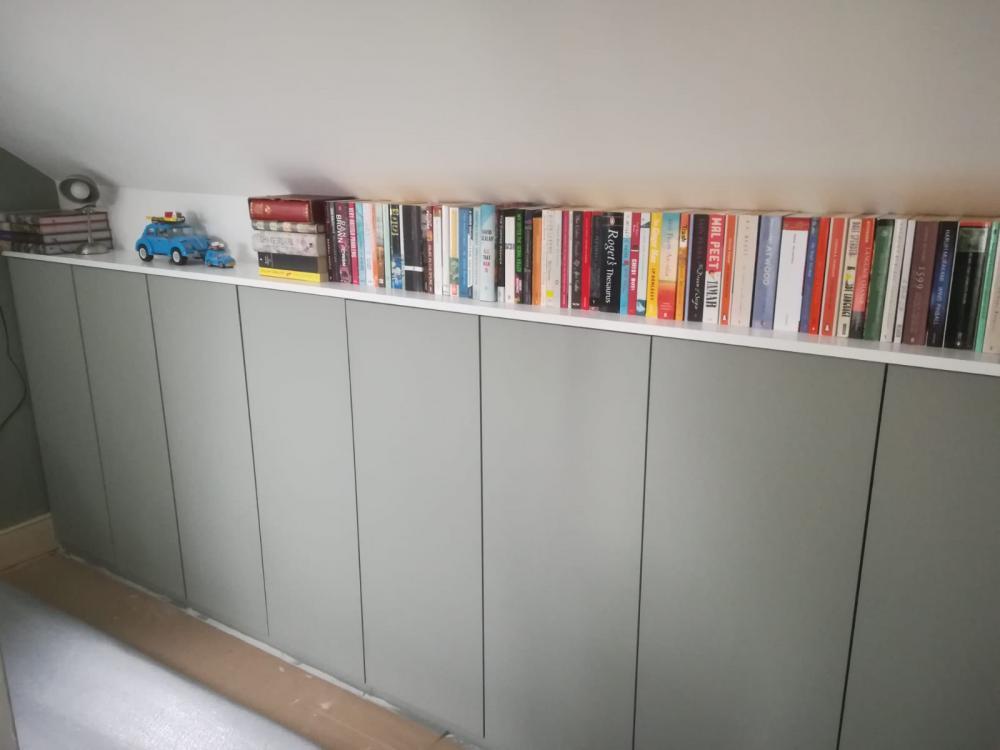
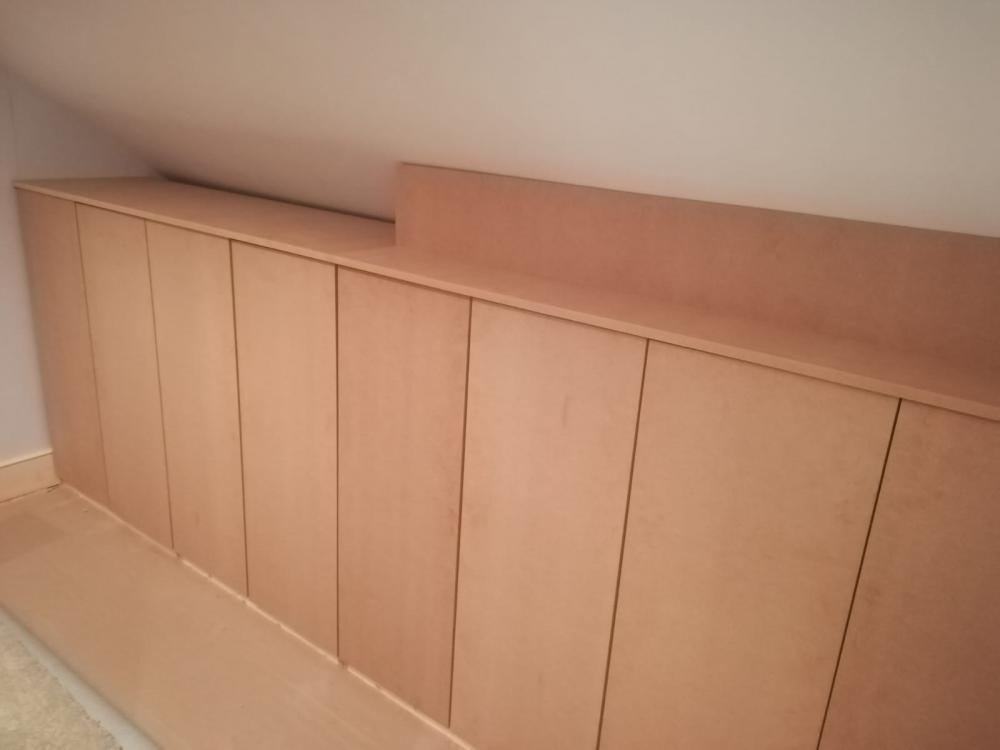
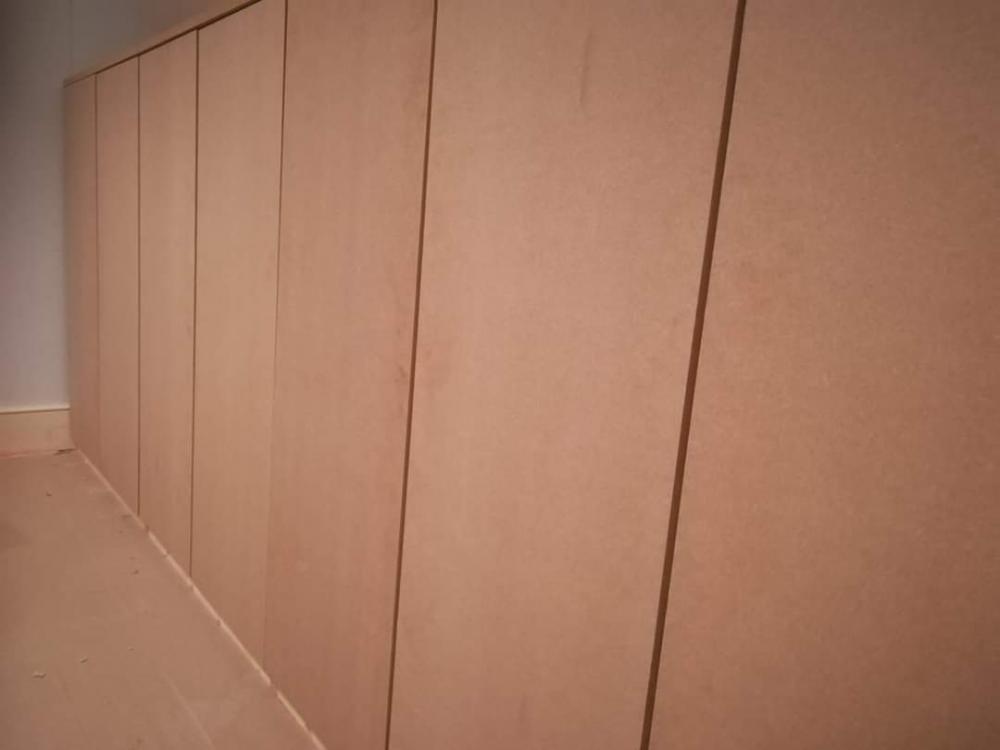
After what seems like endless painting, undercoats and top coats of all the MDF and then walls and ceilings, we eventually finished. The new unit looks great, we've organised someone to refit the carpet next week and there's still some skirting boards to paint at some point but otherwise for now we're finished!
See More: #DIY |
 | Posted by Ben Taylor at 19:32 |
| comments 0 |
February DIY Day 5
Tuesday, February 18, 2020
Today we made a start on the shelves inside the new cupboards. The shelf supports we bought from Screwfix are the same sort that you use inside kitchen cabinets and are designed to be adjustable. I liked the idea of being able to set the shelves at different heights so in order to drill the holes inside the cupboard we made another jig out of some spare wood. Once complete we set about drilling the shelf holes.
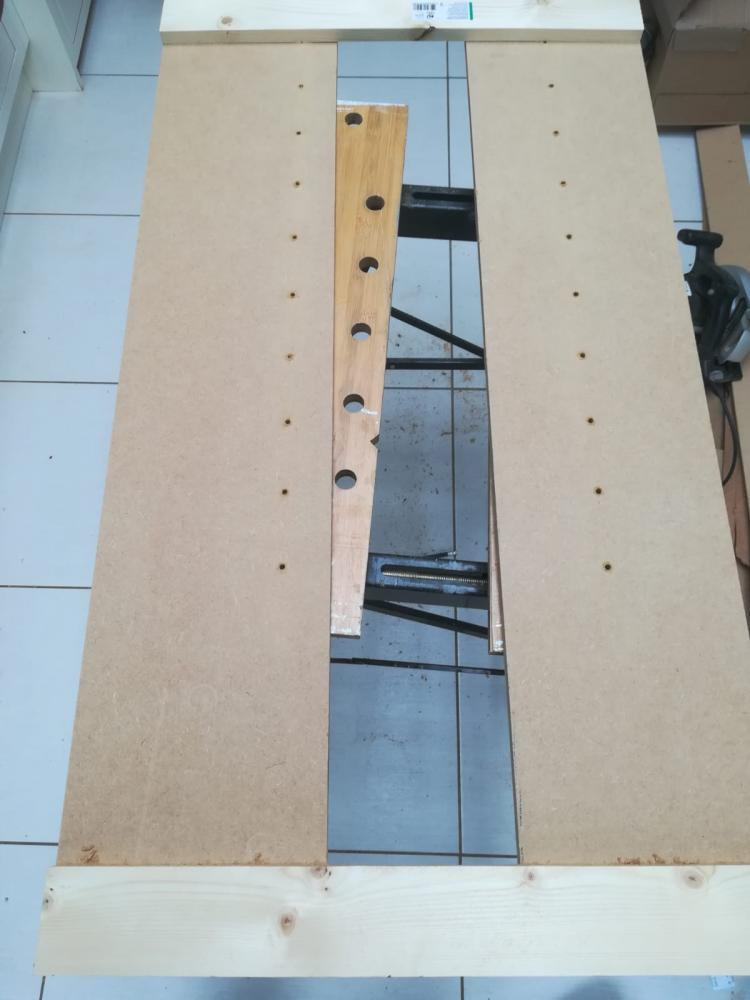
This worked really well, and in no time we had holes drilled in all four cupboards.

Now it was time to start painting. We stopped by Screwfix again to buy undercoat paint for all of the MDF, then took the doors off the units and got started. Dani made a start with the white emulsion, painting the ceiling, whilst I made a start undercoating the doors. The doors took two coats of undercoat on each side and with 8 doors to paint for this unit alone, it was looking like a big job.
Linked Album |
See More: #DIY |
| Posted by Ben Taylor at 22:31 |
| comments 0 |
February DIY Day 4
Monday, February 17, 2020
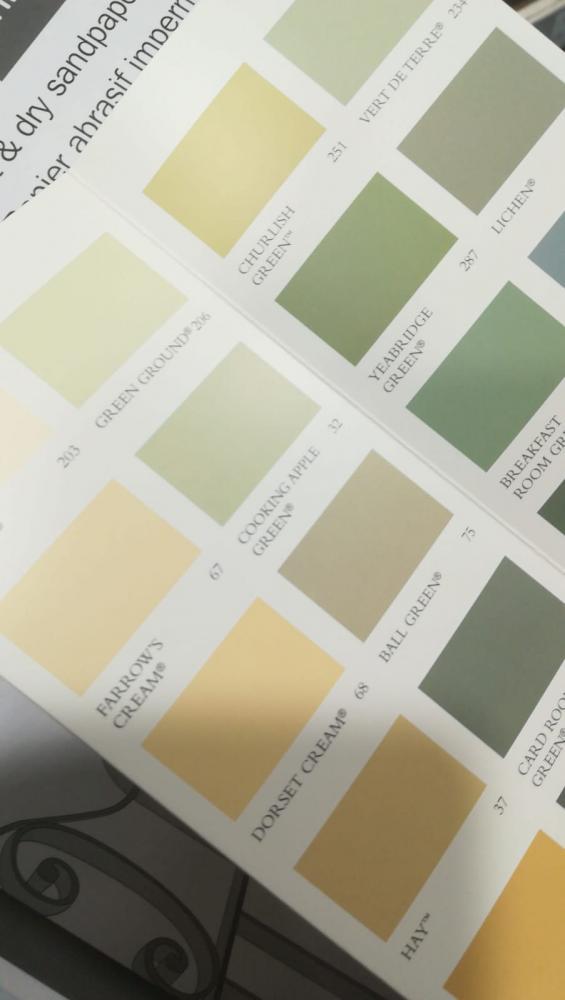
There were two main jobs to complete today. First we needed to get the extra wood for the shelf back panel, cut and fit it, and secondly we needed to get some paint. We ended up buying another full sheet of MDF and geting some shelves cut, as the size of the piece needed for the back panel required the bigger sheet. Whilst there we had a look at the paint colours as they are in the middle of a 3 for 2 offer. We saw a Farrow and Ball paint colour, "Pigeon" on the colour chart that we quite liked, but B&Q didn't have it in stock, so we ended up coming away with nothing more than a couple of colour charts. On the way back we also picked up shelf supports from Screwfix for our new shelves.
Back at home we decided to make a trip over to Homebase as they tend to have a larger stock of the Farrow and Ball range. Sadly they didn't have any tins eiither, we did ask about ordering it in, but it was going to take 14 days, so the assistant suggested looking online. Back at home again we found we could order the paint from B&Q with the 3for2 offer and get free next day delivery - winniner! With the paint ordered, we made a start on our other job, cutting the back panel. This ended up being a massive faff, with a height difference of more than 10cm from left to right, this was in addition to cutting the angle away from the back. It took a long time but we were really pleased with the final result. We added wooden blocks to the rear or the backpanel and then secured it in place screwing through the underside of the shelf from inside the cabinet into the blocks. Finally we added decorators caulk along the edge where the MDF met the underside of the eave, and the job was complete.
Linked Album |
See More: #DIY |
| Posted by Ben Taylor at 21:43 |
| comments 0 |
February DIY Day 3
Sunday, February 16, 2020
After a spot of bowling, we got back to work on the project. Today seemed a little less productive but involved a lot of trial and error. We started off by cutting the shelf for the top of the units. We were really keen to get a nice finish, but neither wall was exactly straight so in order to get the finish we were looking for, there was a lot of measuring, cutting and remeasuring before it was right.
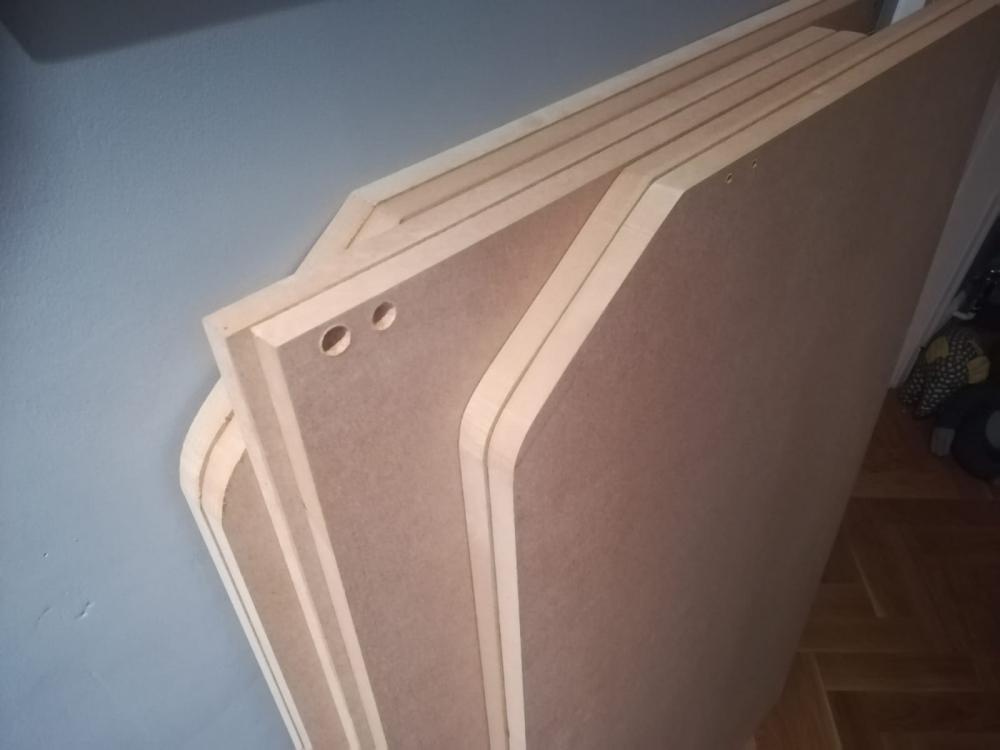
With the shelf in place, we had decided to make a back panel rather than leave it open to meet the corner of the eave, it was also hoped this may give the illusion that the storage is shallower and less intrusive in the room. We only had enough wood to make half the back panel, but as it was that took the rest of the day. It was quite a complex cut with the angle of the eave having to be trimmed from the back and the the angle at which the roof sloped along the width being taken into account, not to mention the angle when it met the wall.
It seems we'll need to make another visit to B&Q tomorrow, and we haven't picked out any paint yet!
Linked Album |
See More: #DIY |
| Posted by Ben Taylor at 23:04 |
| comments 0 |
DIY storage Day 2
Saturday, February 15, 2020
We had another busy day today on the storage project. We started off early at B&Q again getting some more wood cut. We had MDF cut for the doors and also some MDF sheets to make a shelf across the sop of the units. The shelf had been a last minute addition to the project, it had the benefit of adding a new place for the many books we have, and the added benefit of bringing the height of the sides down to a point where we could fit 4 to a sheet.
After a productive morning at B&Q, we set to work. We made ourself a jig to help us with cutting the holes for the hinges. It's the first time we've used cabinet hinges in one of our projects and we were a bit anxious about getting it right. We started by making a demo up on some MDF offcuts and then when we were happy with it, we turned the demo into a jig. With the template in place, we got the hinge sockets drilled quickly and then spent the rest of the day getting these fitted onto the units. Although the whole unit has to come apart again for painting, we wanted to check and see the doors would all fit as planned and get the holes in place, so we don't have to ruin any painted surfaces later.
The hinges ended up being so much simpler than we had anticipated and by the time we had finished the day, all doors were in place, perfectly aligned and part of the shelf was measured up.
Linked Album |
See More: #DIY |
| Posted by Ben Taylor at 22:33 |
| comments 0 |
Happy Valentines Day!
Friday, February 14, 2020
Half term has arrived at last, as always it seems to have been a busy one at school, so the break it a nice change of pace. By a change of pace I actually mean we've taken on a big project that will keep us busier than ever tackling our upstairs spare bedroom. We decided a few weeks ago that we wanted to have a bit of a change around, and decorate, but in order to make the most of the room, we needed a bit more storage. We settled on some cupboards to run along the wall under the eave and had already made a start on creating the shells by the time we broke up today.
Last weekend we bought the wood needed to make the shells, MDF for the sides and some timber to brace across. We had the MDF cut to size at B&Q, but still needed to cut out for the angle and the skirting board. We made a template out of cardboard to speed things up and keep all the cuts consistent and then got started with the jigsaw. Over the course of the last week we got all of the pieces cut ready to put them together tonight.
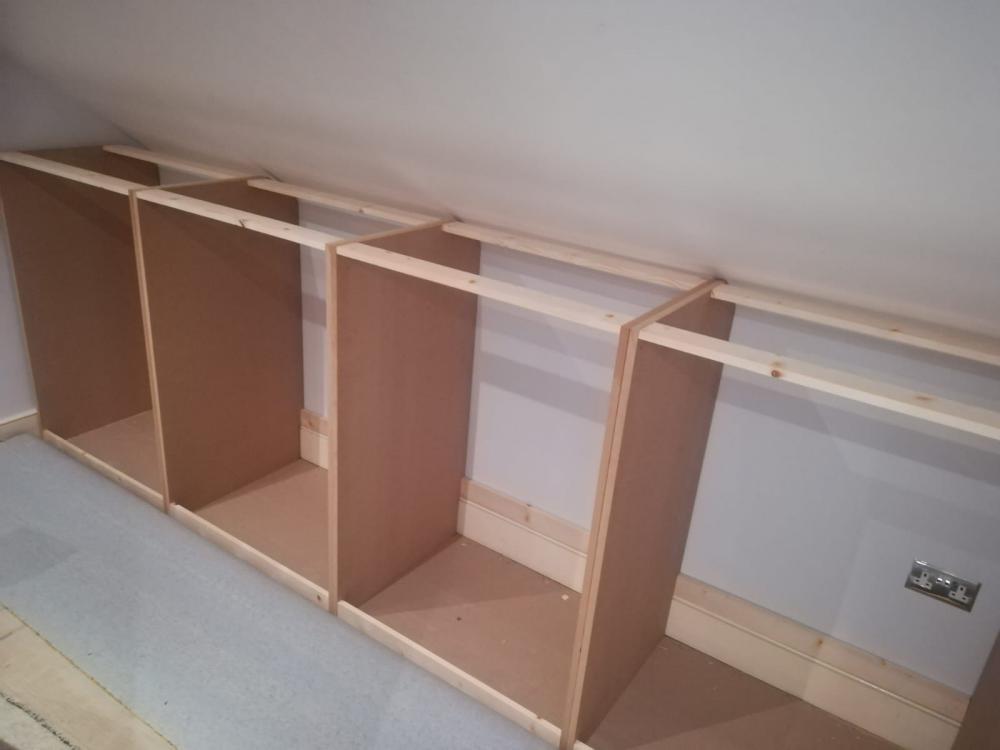
After a nice tea, we got started and before the evening was out we had 4 cupboard shells ready to roll. A great start to the break, but a long way to go!
Linked Album |
See More: #DIY |
| Posted by Ben Taylor at 22:26 |
| comments 0 |